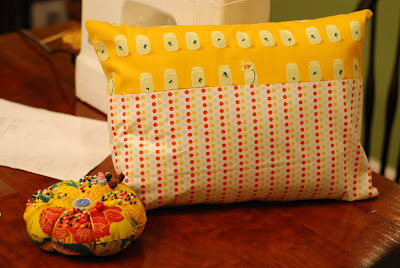
I'm glad to hear there are others out there like me, who thrive on visuals! Here is a tutorial for the super-soft travel pillows from my previous post.
You will need:
12" x 16" pillow form (sold at JoAnn's and other craft stores)
1/4 yard "main print" fabric (or at least 8 1/2" x 44")
12" x 16" pillow form (sold at JoAnn's and other craft stores)
1/4 yard "main print" fabric (or at least 8 1/2" x 44")
1/6 yard of a second print of fabric (or at least 5"x 44")
rotary cutter or shears
iron/ironing board, spray starch (optional)
straight pins (optional)
and your trusty sewing machine
*I recommend pre-washing your fabric for this project, since you'll be fitting a pillow form. If you're lazy like me and would rather wash afterward, you might want to add a 1/2" to each of the following measurements to allow for shrinkage...
 Out of the main fabric (polka dots), cut:
-one piece 8 1/2" x 17 1/2"
-two pieces 8 1/2" x 11"
Out of the secondary fabric (yellow), cut:
-one piece 5"x 17 1/2"
-two pieces 5" x 11"
 Put your pieces together, matching them up by size. Place them right sides together.
  Sew a 1/4" seam across the top, so that when you unfold each set, it looks like this:
Do this for each of your three sets of pieces and press the seams open:
 At this point, You should have three pieces:
-one 13 1/2" x 17 1/2"
-two 13 1/2" x 11"
Next, use your iron and some spray starch to press a 1/2" hem on one edge of both of your 13 1/2" x 11" pieces, making sure that the hems end up facing each other when the pieces are side-by-side:

I like to use a zig-zag stitch to sew the hem:
You are ready to line the two smaller pieces on top of the 13 1/2" x 17 1/2" piece, placing right sides together. The two hemmed edges will overlap, becoming your envelope flap to insert the pillow form.
Once you get your pieces "sandwiched" and lined up, it's a good idea to pin it all in place. (The two pieces on top tend to slide around.) Sew a 1/4" seam around all four sides, reinforcing your corners with some back stitches.
Remove the pins and turn your pillow cover right side out.
This is a great travel pillow for adults too :)
Enjoy!


7 comments:
Great tutorial! This looks like a fun project for my daughter to try as well. The pillow is so cute!
Great tutorial! And you are so right about being good for travel - no pillow popping out the end of a regular case.
Super cute! These would be nice on the couch or bed as well....
Thank you so much. You rock! Love the pictures!
Love the yellow tadpoles! This is a great tutorial, thank you. I can't wait to try it out- my husband has a camo pillow that's just begging for a case. Definitely adding this to my favorites.
so cute! i love mixing up pillows all the time so this is getting added to the mix!
This is such a fun pillow! I'm going to post a link to this tutorial on my blog, on December 27!
sewwhattoday.blogspot
There is "Featured" buttons on the bottom of our blog!
Post a Comment